
I follow quite a few cocktail bloggers (shocking, right?), and so I’ve come across Mixology Monday (MxMo) regularly. MxMo is a monthly cocktail challenge. It is quite similar to the Daring Kitchen cooking I used to do, although it is much less restrictive. With MxMo, someone picks a general theme, and you get to run wild with it. I’m just someone bumbling around at home though, and I’ve never felt like I could jump on the MxMo wagon because I don’t create new cocktails. I’m happy mixing and drinking recipes others have created. This month though I’m finally tossing my hat in the ring because I’ve gotten over the feeling that I have to do something new or stunning, and this month’s challenge lines up nicely with something I’ve been wanting to try for a while. The challenge before us, laid down by Chris at A Bar Above, is to try something new and unknown (to you), either with ingredients or techniques. It’s that simple.
For a while now, I’ve been wanting to give a go at Jamie Boudreau’s violette “caviar.” I even went out and bought what I needed a few months ago, but never got around to it. ‘Bout time now. Once I got to thinking about gelatin and cocktails, I also wanted to experiment a little to see what else I could do. I had a fun day playing with gelatin. Since the gelatin creations aren’t really mixed into the cocktail itself, I think of these more as a fun garnish than as a main component of the drink, so that’s how I went about it.
Caviar
I got the idea of making olive caviar because I was wanting a martini and thinking of the violette caviar. When I sat down to start playing around, I found that there is a Jamie recipe that uses these as well. It was a nice confirmation that using olives would work, assuming I could get the overall concept to work right. When I first went to make my olive caviar, everything was too cold. The oil was so thick that the olive gelatin drops didn’t fall through it, they just sat on top. So apparently you want it cold and viscous, but not that cold. Then the gelatin mixture was too solid as well, as the “caviar” didn’t become round on the way down. By the time the gelatin mixture was the right consistency to drop and become spherical, I’d let the oil warm up too much. I could see the spheres in the bottom, but they were a bit squishy looking, and when I tried to seive them out of the oil they just melted together in one big mess. So, for take two I need to keep the oil cold, but just right where the gelatin can actually fall through it, and the gelatin needs to be much more in a liquid form. I’m going to come back at this again, but I didn’t have time to get to it in this weekend, so I moved on.
Gelatin stickers
With the caviar situation looking sad, I turned to my second gelatin idea, which was to make some maraschino gelatin to create shapes that could stick on the glass. This worked out much better for me since there is less precise science involved. I made the gelatin with maraschino liqueur and some Amarena cherry syrup (I just poured it out of my Amarena jar). I use Amarena cherries for my regular cherry garnishes, and I wanted the syrup to add some cherry flavor and the nice red color. To set it, I poured into some containers so that it was just a thin layer of gelatin to make sheets. Once it set, I used my little micro cutters to cut out some shapes in the sheet. Instead of trying to get the shapes out of the sheet (that was messy), I then just removed the extra gelatin between the shapes, giving me a tray of little stickers that I can easily remove when I need them. I left plenty of space between the stickers to make it easier to remove the extras. It can be a little messy, but works quite well with the resilient gelatin. I used a chopstick to lift up part of the extra and then just pulled it up with my fingers until it broke, and used the chopstick to pop another little section to pull on. Leaving plenty of space between the stickers meant it was easier to get the excess out, and it’s easier to remove a sticker without wrecking those around it. It may look like a waste of the extra gelatin, but you can easily reheat it and reset it into a new sheet, or do like me and simple eat it. It’s really tasty! The thinner the gelatin sheet, the harder it is to get them cut out.

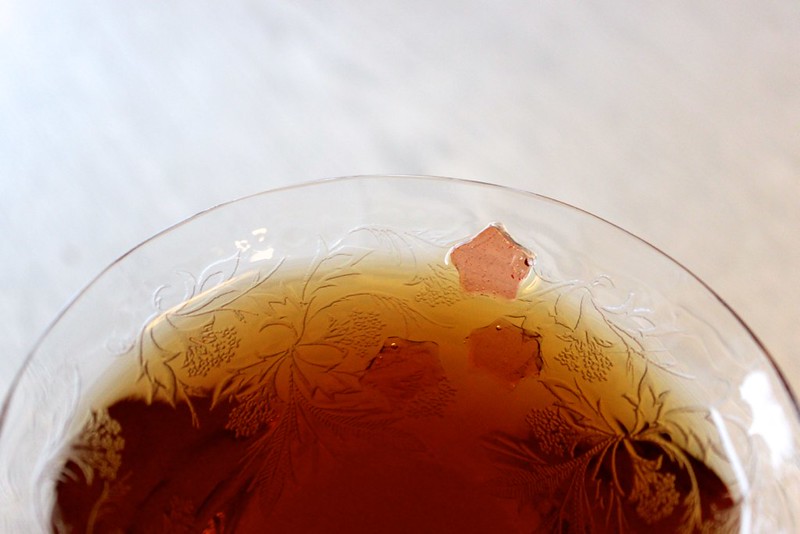
Getting them to stick to the sides was easy as long as the glass was well chilled. A room temperature glass, used for initial testing, led to the stickers floating free and dropping to the bottom when I poured the cocktail in. Using a chilled glass, I didn’t have any problems. Sometimes they stay stuck to the side of the glass, so you may need to swirl the drink as you work your way through to get them off the side, and into the bottom where you can swig them with you last gulp. Alternatively, you can serve this with a little spoon to grab them off the side and eat them as you drink.

I used this in a classic Manhattan and an old-school Casino. The Casino looks prettier due to the light color of the cocktail, but man, I love me a Manhattan. The Manhattan was appealing, aside from being a great standard drink, because the old school Manhattan #2 in the Savoy actually adds some maraschino liqueur to the drink. I don’t generally make my Manhattans that way, but this seemed like a nice way to give a nod to that recipe and have a cherry garnish. The Manhattan was delicious on that last swallow with the stars.
Manhattan with Maraschino Stars
- 2 oz. rye
- 1 oz. sweet vermouth
- dash of bitters
- maraschino gelatin stickers
Stick a few of the gelatin stickers to the inside of a chilled glass and put it in the fridge to stay chilled while you mix. Add drink ingredients to a mixing glass, add ice, and stir to chill. Pull out the chilled glass, and gently strain the drink into the glass.
Maraschino Gelatin Stickers
Makes a LOT of little stickers. I only made about 40 of them and had a lot of gelatin leftover.
- 1.5 oz. Maraschino liqueur
- 1.5 oz. Amarena cherry syrup
- drop of red food coloring (this really wasn’t necessary but I wanted to try it out)
- 1 sheet of Dr. Oetker gelatin (use whatever type and proportions you need for the gelatin you have)
Bloom the gelatin, and very gently heat the liqueur and syrup just enough to dissolve the gelatin. It doesn’t take much. Pour the gelatin into a wide, flat-bottomed container to the thickness you want your stickers. I used several tupperware containers so I could stack them in the fridge. Let them set well (overnight is good). Use small cutters to cut shapes, and then you can remove the extra gelatin between them. This should leave you with a bunch of stickers in your container. Keep them cold.
